
Last updated: by Thanassis Koukoutselos
I have fixed a lot of leaking and worn basketballs over the years, and most problems come down to four things: a hole, a leaking valve, a slippery cover or a lump. This guide shows how I find each one and fix it, starting with the free methods, and when a ball is not worth saving.
Products below are linked to Amazon. As an Amazon Associate I earn from qualifying purchases.
Quick guide: what is wrong with your ball?
| Symptom | Likely cause | First fix to try |
|---|---|---|
| Goes flat over a day or two | Small puncture or a dry valve | Water test, then a wet needle or sealant |
| Bubbles from the valve in the water test | Leaking valve | Toothpick method, then a new valve |
| Bubbles from the cover | Hole in the bladder or cover | Sealant, or a patch on rubber balls |
| Slippery cover | Dirt, dust or sweat | Clean with a damp cloth and dry it |
| A bump or egg shape | Overinflation, or damage inside | Let air out and reinflate correctly |
Step 1: find the leak
Inflate the ball and put it fully under still water, a bathtub or a bucket. At first small bubbles come out of the pores all over the surface; run your palm over the ball to clear them. Be patient: after that residual air is gone, the real leak is obvious, because bubbles keep coming from one spot.
Mark that spot right away with a colored marker, a small circle around it. You might think you will remember where it is. You will not, and you will have to repeat the whole water test, so mark it.
If the bubbles come from the valve, jump to fixing a leaking valve. If they come from the cover, read on.
Step 2: fix a hole
Option A: ball repair sealant (rubber and composite balls)
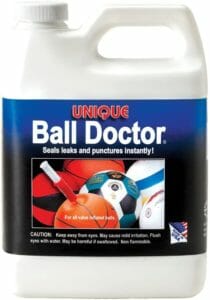
It is one of the most effective fixes for rubber and composite balls. A sealant such as the Unique Sports Ball Doctor is a liquid you inject into the ball through the valve with a syringe. Then you inflate the ball to its normal pressure and bounce it hard for several minutes, so the liquid spreads over the inside of the bladder and plugs the hole from inside. It works on rubber and composite balls, and it is the only option that does not touch the cover.
Check the Ball Doctor sealant on Amazon or the Ball Doctor leak repair kit (3-pack).
Option B: melt the rubber shut (rubber balls only)
For a small puncture in a rubber ball, you can melt a little of the surrounding rubber over the hole. Heat a dull knife (a dull blade, so you do not cut the ball further), press it next to the hole and move the softened rubber over it. Let the rubber cool completely, then bounce the ball hard and repeat the water test.
Be careful: the knife is hot enough to burn you, so this is a job for an adult, away from children, and never on a leather or composite ball, which this would ruin.
Option C: an adhesive patch
If the melt did not hold, or the ball is not rubber, a patch from a repair kit is the next step. Pick a patch slightly larger than the hole, clean and dry the area, and follow the kit’s instructions for the glue. A patch on the cover changes the feel at that spot, so on a good indoor ball try sealant first.
Fixing a leaking valve
To confirm the valve is the problem, do the water test and watch the valve: a steady line of small bubbles from it means the valve is not sealing.
Option A: clean it and try the toothpick method (free)
- Clean the valve: wet the inflating needle and push it in and out of the valve several times to clear dirt. Take your time; any dirt left inside keeps the valve from sealing.
- Remove the needle and push a wooden toothpick into the valve hole.
- Break the toothpick off flush with the surface, leaving the tip in the valve as a plug.
It does not always work, but it costs nothing. Note that the plug stays in, so you will not be able to pump that ball again through the valve. A dry valve can also leak; Spalding recommends dipping the needle in glycerin or water before inserting it (Spalding).
Option B: replace the valve
If the toothpick fails, replace the valve with a kit like the MINDCOLLISION valve replacement kit. Following the kit’s directions:
- Use one of the supplied hooks to pull the old valve out.
- Insert the new valve that comes with the kit.
- Push it in as deep as it will go.
- Cut off any extra length with a pair of diagonal pliers.
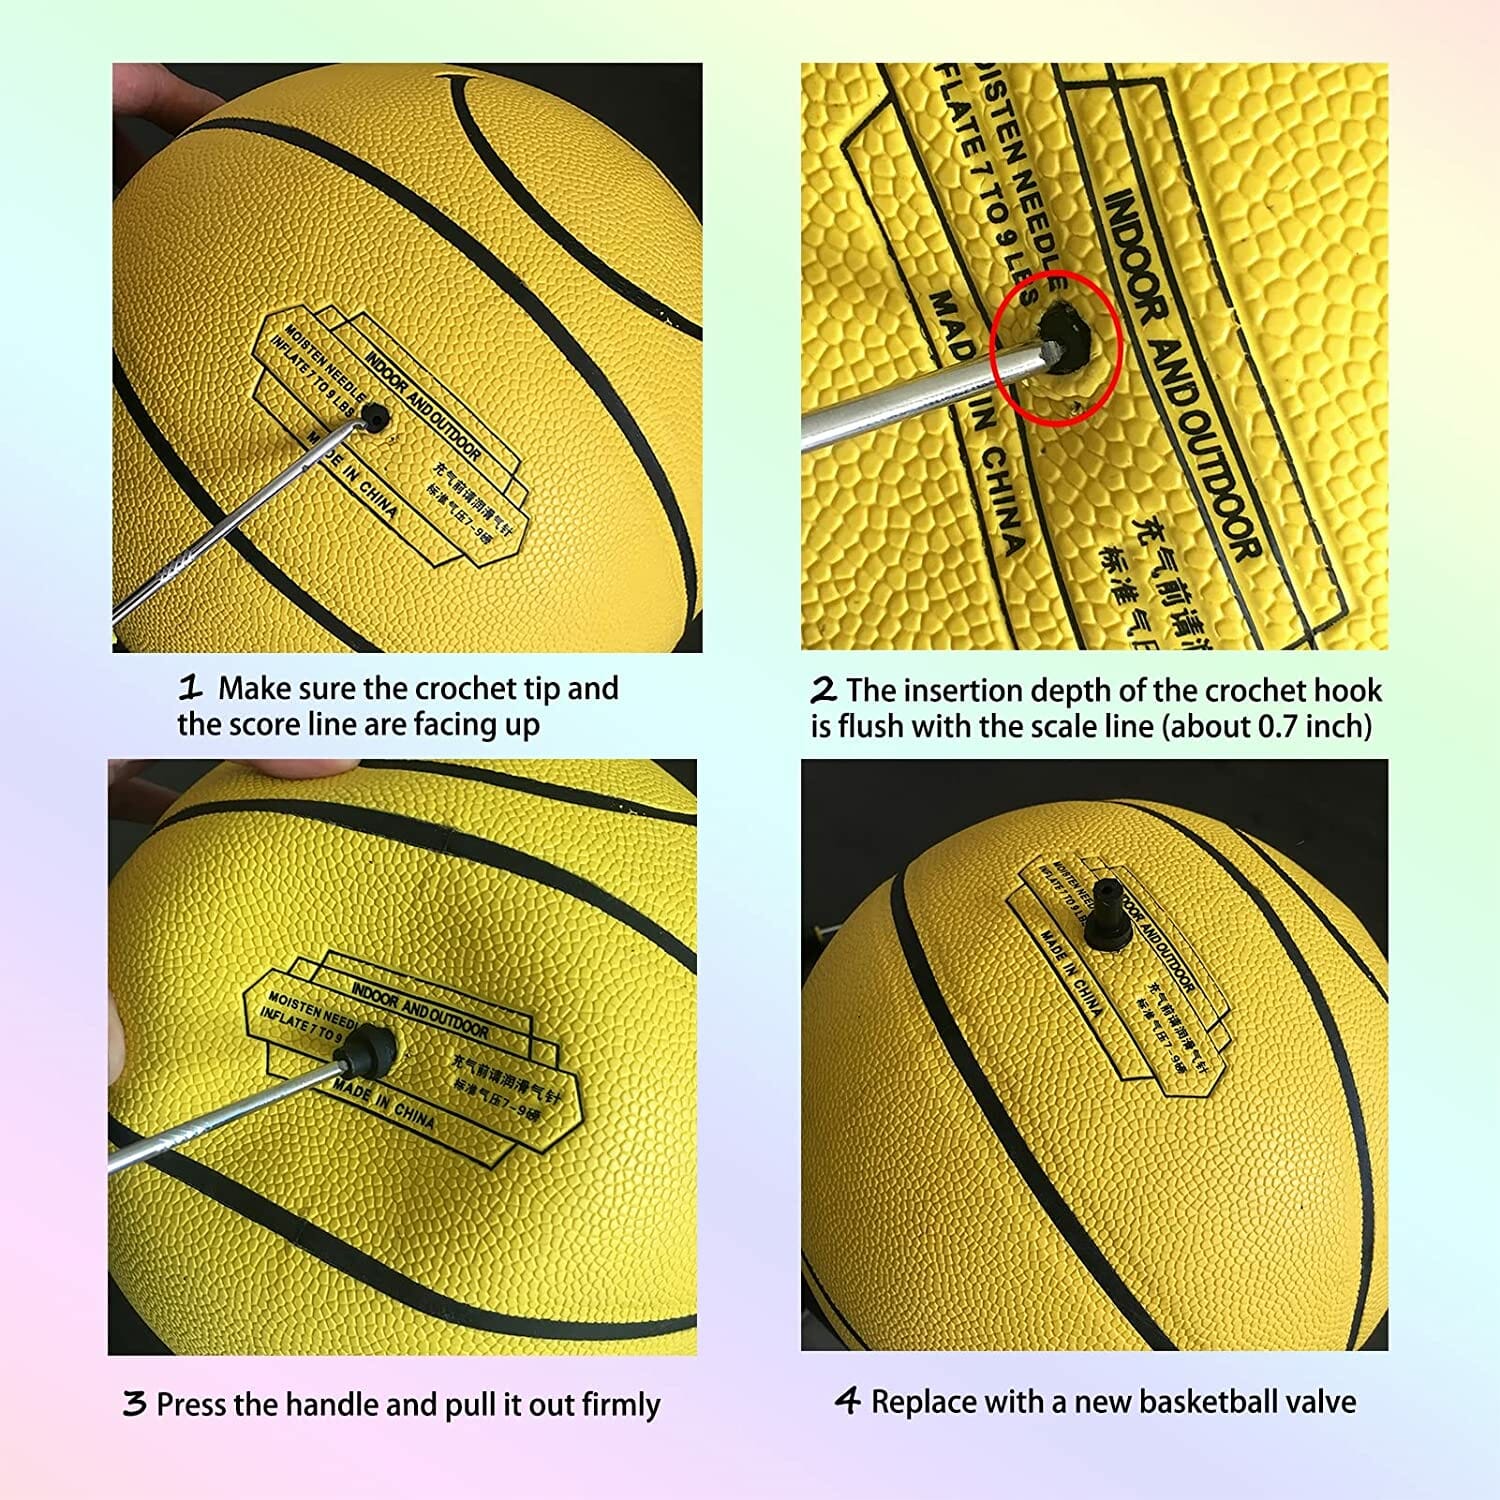
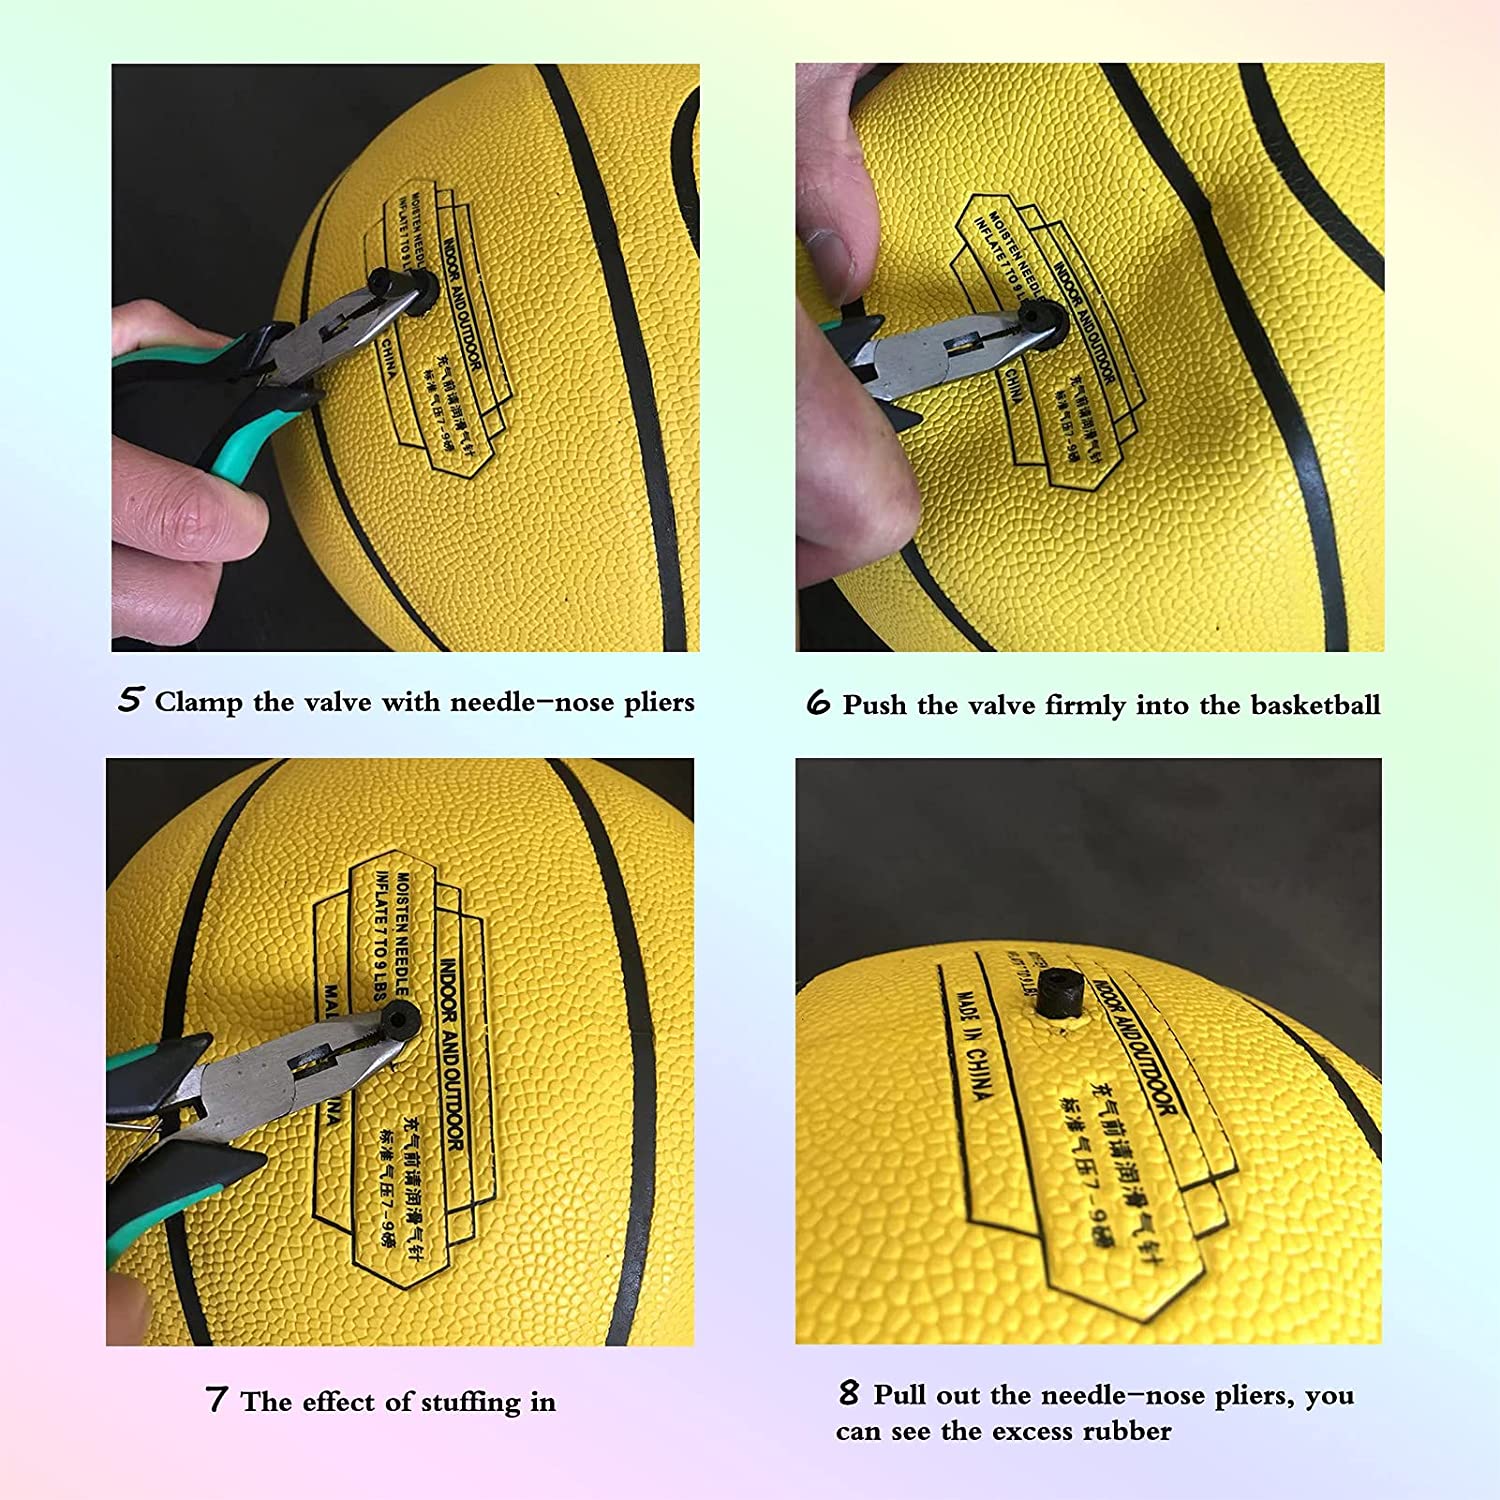
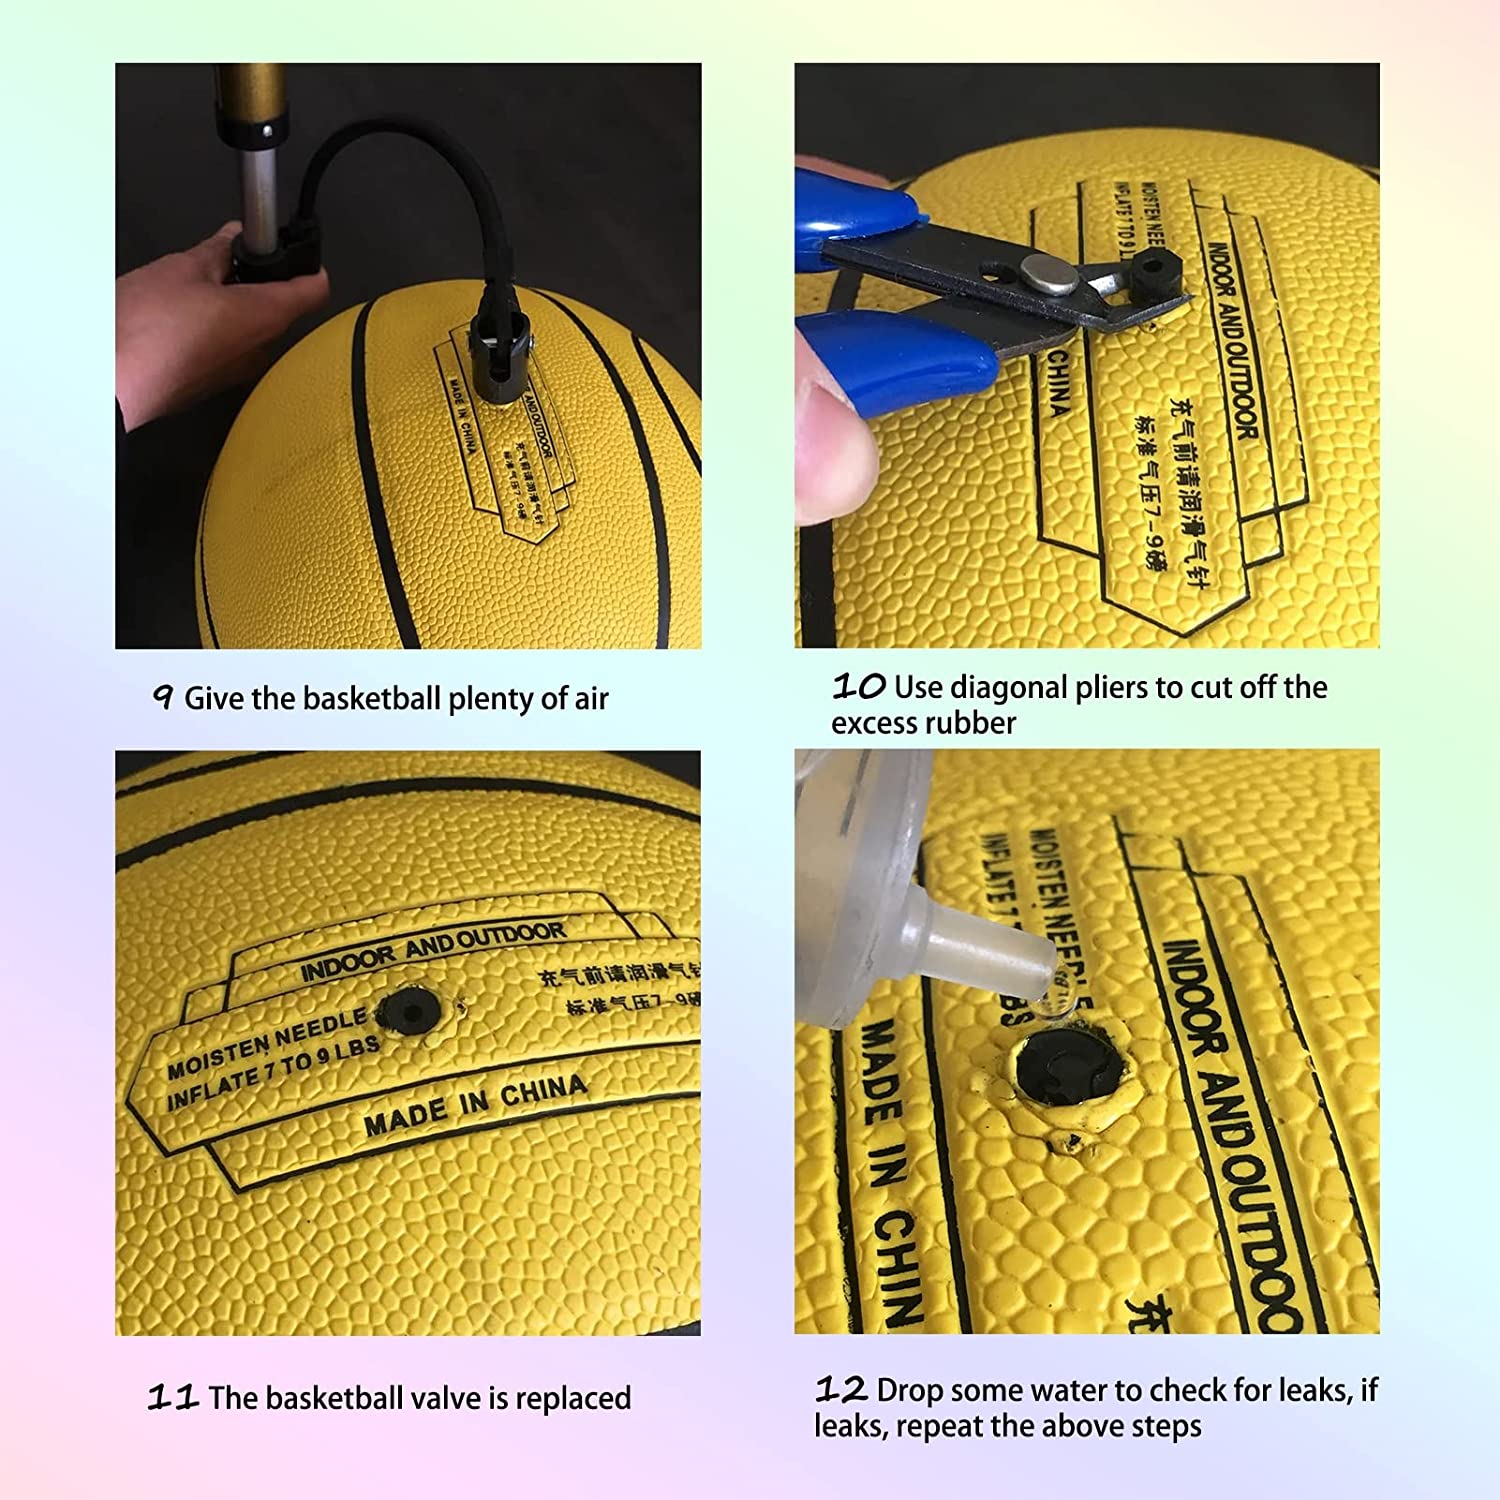
If it still leaks, repeat the process once more. Check the valve replacement kit on Amazon
A slippery cover
On an outdoor ball, a slippery feel is usually dust, dirt, water or sweat, not damage. Wipe the ball with a damp cloth and let it dry completely before you play. If the grip pattern itself is worn smooth, the ball needs replacing.
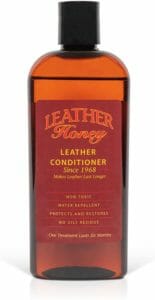
For an indoor leather ball, a leather conditioner keeps the cover flexible: put a little on a clean cloth, work it into the ball in circles, wait at least 15 minutes, then wipe off the excess with a towel.
A lump or bump
Some lumps come from too much air. Let all the air out and reinflate to the right pressure, a little lower than before; check the range printed near the valve or our PSI guide. On a rubber ball you can also run the lumpy area under warm water for a few minutes to soften the rubber and massage it smooth with your hands, then let it dry fully.
If a lump comes back after that, the layers inside the ball have usually come apart, and that cannot be fixed from outside.
When to stop repairing and replace the ball
- A large hole or a tear in the cover.
- The cover peeling or worn smooth all over.
- A valve that still leaks after a replacement.
- A lump that keeps coming back.
For a new ball, start with our picks by use on the homepage or the types of basketballs guide. To understand which part failed, see what basketballs are made of.
FAQ
Can you fix a punctured basketball?
Yes, in most cases: with a sealant injected through the valve, by melting the rubber shut on a rubber ball, or with an adhesive patch.
How do you fix a basketball that will not hold air?
Find the leak with the water test first. If it is the valve, clean it with a wet needle and try the toothpick method or replace the valve; if it is the cover, use sealant or a patch.
Why does my basketball keep going flat?
Usually a small puncture or a dry or damaged valve. Every ball also loses some air slowly over time, so check the pressure before you play.
- How to Pass a Basketball (5 effective tips) - August 25, 2022
- Learn How to Spin a Basketball on your Finger in less than 3 minutes - July 18, 2022
- Where Are Basketballs Made? Spalding, Wilson and Molten (2026) - June 10, 2022
Austin, I have a basketball that was signed by all of the Sixers team years ago. It has split on one of the seams. Any ideas on who could repair it? Thank you.
stay as far away from ball doctor as possible. absolute garbage. instructions do not tell you how to use!! I am amazed that Amazon and Walmart sell this product.